Lighting is perhaps the most important of all the tried-and-true photo taking techniques. Bad lighting can ruin a potentially good photograph. With a few tips for great photos, lighting will always work for you.
I have tried natural lighting alone and a light box and lamps. In the end, the decision is yours. Good photographs can be achieved with either of these photo taking techniques. Try these tips for great photos the next time you start a product photography session:
- Never use direct light. Meaning: never have your light source (natural or not) shining directly on your product. It will cause harsh shadows and glares—no bueno!
- You don't ever want to use flash on your camera when photographing your goods. The flash will cause a "blow-out" and will completely wash out the product. All of the details will be lost.
- No matter which photo taking techniques you use, you should set the white balance on your camera to daylight or natural light.
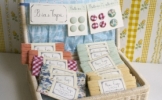
- Your pictures should be somewhat consistent looking. Even if your items are placed in different settings, similar lighting, orientation, magnification and framing of can pull it all together.
- Pictures staged a certain way can play a very important role in branding your site.
Natural Light
One of the best tips for great photos is to always use natural light, whenever possible. With natural light, it is easier to "stage" your photographs. You can shoot stationery at a desk, put magnets on a refrigerator....you get the idea. A customer can imagine wearing your product or placing it in her home with the right setting. You can also play around with different colors and really inject your personality into the photograph. Using a setting in natural light gives your product life.
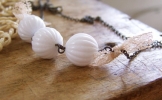
If the sun is particularly bright that day where you usually shoot, the most you can do is add a sheer sheet or curtain to the window in hopes of diffusing the light. That being said, overcast days are good for photographing your things. Light cloud cover provides a natural light diffuser. Here is an example of a piece photographed in natural light:

How To Build an Artist Website
Sign up for our newsletter and get the book How to Build an Artist Website for free!
.jpg)
Remember when using natural light in "staged" settings, the background may distract from your product. Good photo taking techniques always keep the focus on the item you are trying to sell.
Light Box and Lamps
But what if your free time starts at sunset? I like getting some of my photography out of the way during the week after work so I am not photographing and editing all weekend.
Some of the best tips for great photos involve constructing and using a light box to simulate bright, but indirect, daylight. You can build your own or buy one from a camera store. I built my own one because it is easy, cheap, and of course D.I.Y! I used these instructions: http://strobist.blogspot.com/2006/07/how-to-diy-10-macro-photo-studio.html
Once your light box is constructed, use daylight or natural light bulbs. Generally, everything looks better in natural light even if it is bulb form. We all know how we look under the fluorescent glow of the lights in stores. It's not a good look for you, me or your product.
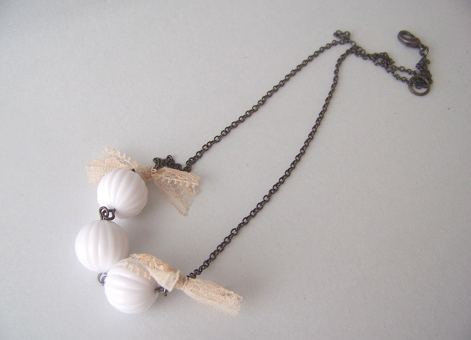
A light box and lamps also provide more uniform photography. Rows of photographs set similarly are easy on the eyes. This method is a terrific option for those of us who sell intricate, detailed stuff. There is nothing distracting from the detail of your item.
Here is the same necklace shot in a light box:
Both photo taking techniques have their pros and cons. Either way, natural lighting (whether using the daylight or a natural light bulb) will always be best. It's up to you to decide which of these photo taking techniques complements your pieces better.

